
Safety Precautions and Warnings
Always handle fuel with care, as it is highly flammable. Refuel outdoors, away from sparks or flames, and avoid inhaling fuel vapors. Ensure proper ventilation and store fuel safely. Wear protective gear, including gloves and eyewear, when operating the trimmer. Keep children and pets away during use. Never modify the trimmer or use unauthorized attachments. Follow all instructions in the manual to ensure safe and efficient operation.
1.1 Essential Safety Tips for Handling the Trimmer
Always wear protective gear, including gloves and eyewear, when operating the trimmer. Ensure a firm grip on the handles for better control. Keep children and pets at a safe distance. Never touch the cutting line while the engine is running. Avoid operating the trimmer near open flames or sparks. Use only Homelite-approved cutting lines to maintain safety and performance. Read the manual thoroughly before starting the engine.
1.2 Fuel Safety and Storage Guidelines
Handle fuel with care, as it is highly flammable. Always refuel outdoors, away from sparks or open flames. Use approved fuel containers and store them in a cool, well-ventilated area. Keep fuel away from heat sources and never inhale vapors. Ensure the trimmer’s tank is tightly sealed after refueling. Store unused fuel safely, following local regulations and guidelines.
Assembly and Initial Setup
Begin by unboxing and inventorying all parts. Attach the trimmer shaft and handle securely. Adjust the shoulder strap and grip for comfort and proper fit. Ensure all components are tightly fastened before use.
2.1 Unboxing and Inventory of Parts
Start by carefully unboxing and listing all components, including the trimmer head, shaft, handle, shoulder strap, and hardware. Refer to the manual for a detailed inventory list. Ensure all parts are included and free from damage. Organize screws, bolts, and accessories for easy access during assembly. This step ensures a smooth setup process.
2.2 Attaching the Trimmer Shaft and Handle
Align the trimmer shaft with the handle, ensuring proper fit. Secure the connection using the provided bolts. Tighten firmly with an Allen wrench for stability. Double-check the alignment to ensure straight operation. Avoid over-tightening, as this may damage threads. Ensure the handle is securely attached for safe and comfortable use during trimming tasks.
2.3 Adjusting the Shoulder Strap and Grip
Adjust the shoulder strap to fit comfortably, ensuring even weight distribution. Secure the grip firmly for control. Align the handle to your preference for optimal ergonomics. Tighten all connections to prevent loosening during use. Ensure the strap and grip are properly fitted to reduce fatigue and maintain precise trimming control throughout operation.

Starting the Engine
Prime the engine, set the choke, and pull the starter rope firmly. For cold starts, use full choke; for warm starts, half choke. Ensure proper ignition.
3.1 Priming the Engine for the First Start
Before starting, locate the primer bulb and press it 3-5 times to circulate fuel. Ensure the choke is closed for cold starts. Pull the starter rope firmly until the engine coughs, then open the choke slightly. Repeat if needed until the engine runs smoothly. Always follow manual instructions for proper priming techniques.
3.2 Using the Choke and Throttle correctly
3.2 Using the Choke and Throttle Correctly
Use the choke to start a cold engine by closing it fully. Once the engine coughs, gradually open the choke until it runs smoothly. For warm starts, leave the choke open. Adjust the throttle for desired speed, ensuring optimal performance. Avoid over-revving the engine. Always refer to the manual for specific choke and throttle guidance tailored to your model.
3.3 Cold Start vs. Warm Start Procedures
For a cold start, close the choke fully and pull the starter rope gently until the engine coughs. Gradually open the choke until it runs smoothly. In warm starts, leave the choke open and proceed with the throttle. Avoid over-revving the engine during starts. Always refer to the manual for model-specific guidance.

Fuel Mixture and Tank Maintenance
Use a 40:1 fuel-to-oil ratio for proper engine function. Refuel outdoors with the engine off, using fresh, unleaded gasoline and synthetic oil. Check for leaks regularly.
4.1 Correct Gas-to-Oil Ratio for the Trimmer
The recommended gas-to-oil ratio for your Homelite gas trimmer is 40:1. This means mixing 40 parts of gasoline with 1 part of high-quality 2-cycle engine oil. Proper mixing ensures optimal engine performance and longevity. Always mix fuel in a well-ventilated area, using an approved container, and stir thoroughly before refueling. Avoid over- or under-mixing to prevent engine damage.
4.2 Refueling Safely and Efficiently
Always refuel your Homelite trimmer outdoors, away from open flames or sparks. Turn off the engine and allow it to cool before refueling. Use a funnel to prevent spills and ensure the cap is securely tightened after refueling. Never overfill the tank, as this can cause fuel to spill during operation. Wipe up any spills immediately and dispose of rags properly to avoid fire hazards.
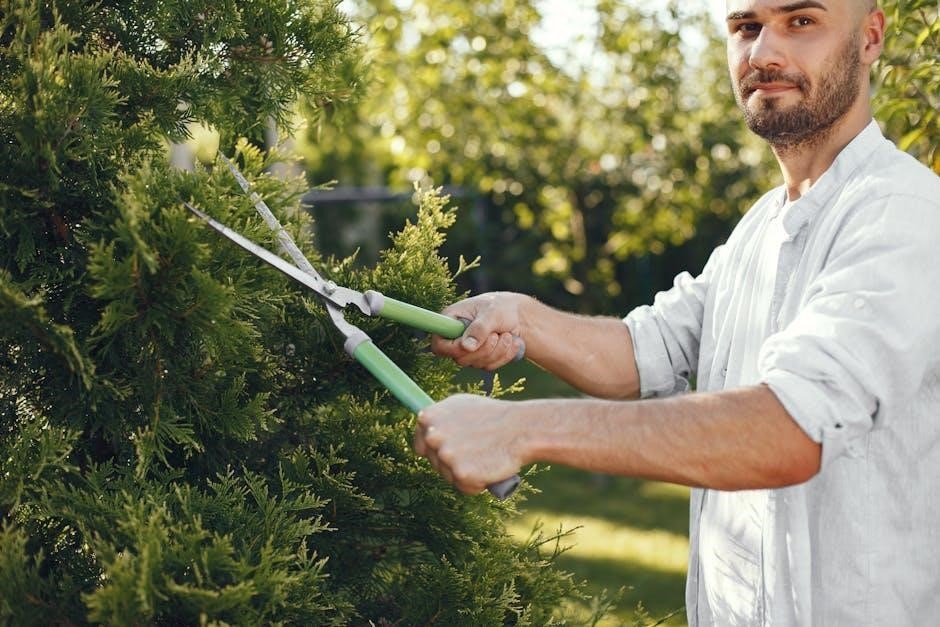
Operating the Trimmer
Keep the trimmer tilted toward the grass, using the tip of the line for cutting. Maintain a firm grip on the handles for better control. Always use the trimmer as intended and avoid unauthorized attachments. Ensure the trimmer is blade-capable if needed and follow all safety guidelines for optimal performance.
5.1 Proper Technique for Trimming Edges
Hold the trimmer at a slight angle, using the tip of the cutting line to create clean edges. Keep the trimmer moving steadily to maintain even results. Avoid applying too much pressure, which can damage the line or engine. Ensure the area is clear of debris for precise cuts and optimal performance.
5.2 Adjusting the Trimming Angle for Optimal Results
Adjust the trimmer angle based on the task. For edging, tilt the head slightly to create clean lines. For general trimming, keep the head parallel to the ground. Use the tip of the cutting line for precise cuts and to avoid excessive line wear. This technique ensures efficient cutting and maintains consistent results across different surfaces and vegetation types.
5.3 Using the Trimmer for Different Terrain Types
For flat areas, maintain a steady pace and keep the trimmer head parallel to the ground. On slopes, tilt the trimmer slightly uphill to maintain control. In dense vegetation, use short, controlled swings to avoid overwhelming the cutting line. For tight spaces, adjust the angle and use the tip of the line for precise trimming, ensuring efficient results across varying terrain.

Troubleshooting Common Issues
Identify engine issues by checking the air filter and spark plug. Address cutting line problems by ensuring proper installation and tension. Inspect the carburetor for fuel flow blockages and clean as needed. Consult the manual for detailed solutions to restore optimal performance.
6.1 Diagnosing Engine Problems
Check for common engine issues like a flooded engine or faulty spark plug. Ensure the air filter is clean and properly installed. Verify fuel flow and mixture accuracy. If the engine doesn’t start, refer to the manual’s troubleshooting guide for specific steps to address ignition or fuel system problems effectively.
6.2 Fixing Issues with the Cutting Line
If the cutting line isn’t feeding or breaking frequently, check for proper spool installation and alignment. Ensure the line is correctly wound and not tangled. Use only Homelite-recommended monofilament string to avoid issues. Inspect for worn or damaged parts and replace them as needed. Regularly clean the spool and trimmer head to maintain optimal performance.
6.3 Solving Carburetor and Fuel Flow Problems
If the carburetor is clogged or fuel flow is restricted, clean or replace the air filter and spark plug. Use a carburetor adjustment tool to reset the fuel-air mixture. If issues persist, check for blockages in the fuel line or carburetor jets. Consider replacing the carburetor if damage is detected. Always refer to the manual for specific adjustment procedures.

Maintenance and Upkeep
Regularly clean the air filter and spark plug to ensure proper engine function. Replace the cutting line and spool as needed. Store the trimmer in a dry, cool place during off-season to maintain performance and longevity.
7.1 Cleaning the Air Filter and Spark Plug
Regularly clean the air filter to ensure proper engine performance. Remove the filter, gently brush off debris, and reinstall. Inspect the spark plug for wear or fouling. Clean or replace it as needed to maintain efficient combustion. Always follow manual instructions for proper cleaning techniques and replacement guidelines to keep your trimmer running smoothly.
7.2 Replacing the Cutting Line and Spool
To replace the cutting line and spool, turn off the engine and allow it to cool. Remove the spool by pulling it straight off the trimmer head. Cut a new line to the recommended length, thread it through the spool, and reattach. Ensure the line is properly seated and the spool is securely fastened. Always use genuine Homelite parts for optimal performance.
7.3 Storing the Trimmer for Off-Season
Drain the fuel tank or add a fuel stabilizer to prevent corrosion. Clean the air filter and spark plug, and store the trimmer in a dry, cool place. Remove the cutting line spool to avoid damage. Cover the trimmer to protect it from dust and moisture. Regular off-season maintenance ensures the trimmer is ready for the next use. Always follow manufacturer guidelines for storage.

Accessories and Replacement Parts
Explore compatible accessories like cutting lines, spools, and carburetors. Genuine replacement parts ensure optimal performance. Visit Sears Parts Direct for authentic components and detailed diagrams for easy installation.
8.1 Compatible Accessories for the Homelite Trimmer
Enhance your trimming experience with genuine Homelite accessories. Compatible options include high-performance cutting lines, replacement spools, and carburetor adjustment tools. Additionally, explore protective gear like gloves and eyewear for safe operation. Visit authorized dealers or Sears Parts Direct for authentic components designed specifically for your Homelite gas trimmer model. Always consult the manual for compatibility before purchasing.
8.2 Finding Genuine Replacement Parts
Locate genuine Homelite replacement parts through authorized retailers or online platforms like Sears Parts Direct. Ensure compatibility by referencing your trimmer’s model number. The manual provides a detailed parts list, aiding in accurate selection. Always verify authenticity to maintain performance and warranty validity, and avoid using non-approved components that could compromise safety or functionality.

Warranty and Customer Support
Homelite offers a comprehensive warranty program for its trimmers. Contact customer support for assistance with repairs, replacements, or inquiries. Visit the official website or Sears Parts Direct for resources.
9;1 Understanding the Homelite Warranty Program
The Homelite warranty program provides coverage for defects in materials and workmanship. Visit the official Homelite website or Sears Parts Direct for detailed warranty terms and conditions. Register your product to ensure coverage and access exclusive support. Contact customer service for assistance with warranty claims or repairs.
9.2 Contacting Customer Support for Assistance
For assistance, visit the official Homelite website or Sears Parts Direct. Use the “Service & Support” section to find contact details. Call 606-678-9623 or 606-561-4983 for direct support. Ensure you have your model number ready for efficient service. Representatives are available to help with warranty claims, repairs, and troubleshooting.

Environmental and Regulatory Information
Your Homelite trimmer complies with environmental regulations and emission standards. Properly dispose of old trimmers and parts according to local guidelines to minimize environmental impact.
10.1 Emission Standards and Compliance
Your Homelite gas trimmer is designed to meet EPA and CARB emission standards, ensuring reduced environmental impact. Regular maintenance, such as cleaning the air filter and using the correct fuel mixture, helps maintain compliance and optimal performance. Always follow local regulations and guidelines to support eco-friendly operation.
10.2 Proper Disposal of Old Trimmers and Parts

Dispose of old trimmers and parts responsibly. Drain fuel and oil, and follow local regulations for hazardous waste disposal. Recycle metal components when possible. Do not dispose of trimmers in regular trash. Check with local recycling centers or waste management facilities for proper procedures to ensure environmental safety and compliance with disposal guidelines.